Full browser WebGL templates with CSS
There is a number of layout options for embedding the WebGL player in an HTML page now. Unity gets shipped with two standard WebGL templates and custom templates feature. This is an update to my previous post here.
The standard templates include the default and the minimal template.
The minimal template comes only with the minimal files for runnung the WebGL player only and doesn’t provide any output for the loading time. During the build process the minimal template generates the .htaccess and index files together with the Release/ and Compressed/ data folders inside the build folder.
The default template also adds a TemplateData/ folder with the UnityProgress.js file in it. On loading the webpage the UnityProgress.js generates and adds the loading elements to the parent node of the canvas element in the index document and then uses them to visualise the loading progress.
I came across a very interesting blog post here. The most important I have learned from it is that all the resizing can be done purely with css so there is no need of any javascript for canvas size initial setup or onResize action.
I started from the default template and then forked it a bit, getting three new templates:
- full browser window flexible
- full window flexible & footer
- full window flexible & sidebar
Comparing to the default template – in the full browser flexible template I have given up the canvas background element and styled the page backrgound instead, because they have the same size. Then I will be able to easily pass on the styling data with the $_GET or $_POST to the index.php file.
I found this very useful for one of my projects where I have one common loading scene and over a hundread of target scenes loaded from AssetBundles. Then I pass the url of requested scene bundle as an argument to the index.php file. Now I can use the same argument to set the loading screen background.
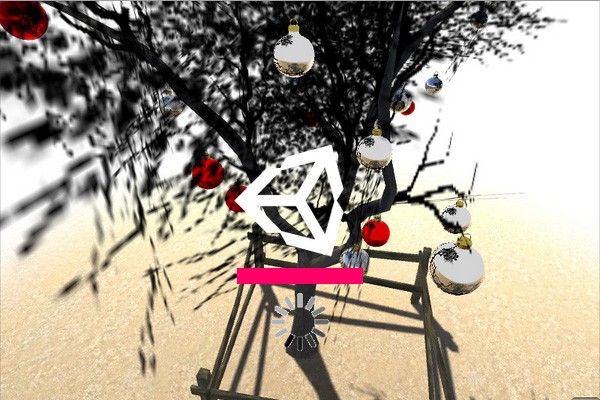
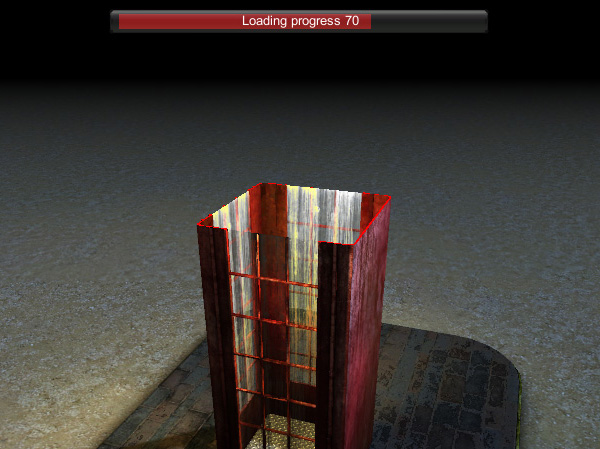
The loading process has a data downloading phase which is illustrated by a progress bar and then follows a data processing phase, when – in the default template – user is being made to wait and nothing is happening. In all these templates I have added an animated gif for that.
These templates are ready for download inside unityPackage below:
Unity3d WebGL player vs WebPlayer – comparison experiment
Here is a simple comparison between Unity WebPlayer and WebGL player builds generated from the same project.
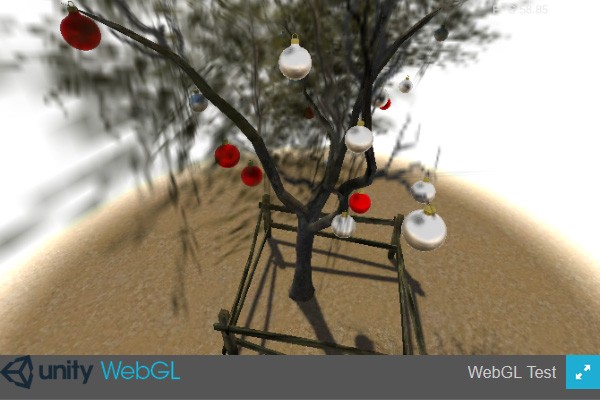
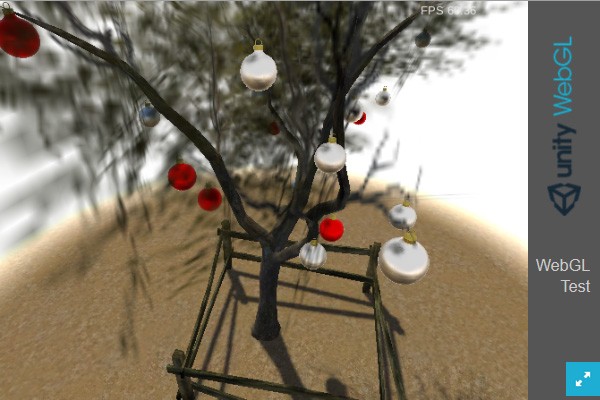
The project is just a quite complex christmas tree scene which just fits to the current season of the year. I have placed the WebGL player page inside the iframe below. You can replace it with Unity Webplayer on clicking the buttons below the iframe. The main comparison parameter is the loading time.
The players look and work exactly the same, except that I can’t get the fullScreen mode to work when the WebGL player is contained inside the iframe. This test uses the player-browser communication and WWW classes and forms, which work the same in both cases.
The table below is intended to show the non cached loading times collected over time.
The iframe loading time inside the iframe shows the total time between the window.performance.timing.domContentLoadedEventEnd and window.onLoad events.
The player loading time shows the time interval between window.performance.timing.domContentLoadedEventEnd and Start() function inside the player.
Click on the buttons to test all that and get your entry recorded.
The WebGL build settings include:
The WebGL build files weight is around 6 times as much as for the WebPlayer, but the loading time is not that much longer.
Obviously once the files load from the web for the first time it gets cached. If you enter this page for the first time the files are supposed to get loaded from the server, while in subsequent cases might probably get loaded from cache. In order to force them to load from the server again I used location.reload(true); to reload the iframe.
Fortunately not all of the webgl build files are necessary. They are grouped in Compressed and Data folder. In this case the total 125 MB distributes into 33 MB inside Compressed folder and 92 MB in Data folder. Four files in the data folder have their gzipped equivalents inside the Compressed folder. The .htaccess file located in the build root folder defines the binds between them. Depending on the server configuration, in most cases, including this one, only the compressed files are used.
A reward for large build files seems to be a much much shorter WebGL player reloading time once the files get cached on the machine.
Full browser WebGL unity3d template
The Unity 5 WebGL player build pipeline – as of time of writing this – comes with one embedding layout option only, and lacks template customizaton options acompannying the webplayer pipeline. In order to add some customization to that you have just to modify the automatically generated index.html file. (Now you can skip reading this and go to updated version of this post – updated on 2015-07-13).
The commonly used layouts include the full browser WebGL layout. The essential element of full browser window layout is a javascript function capable of measuring the browser window size and adjusting the canvass size to that. This will be the OnLoaded() function in this case. Here is the link fo a basic full browser WebGL layout.
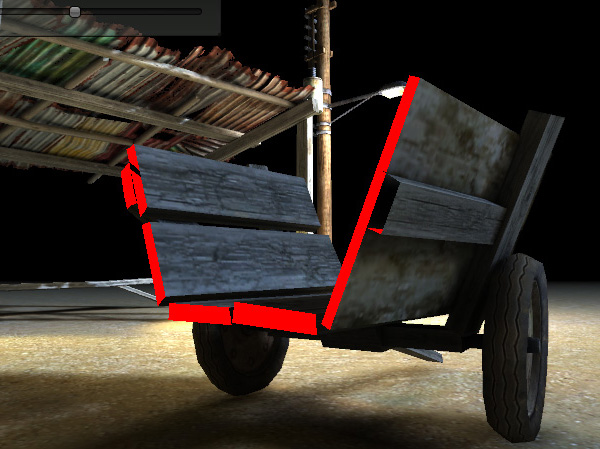
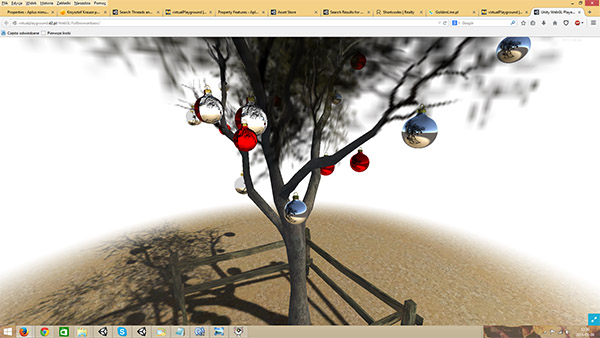 In order to sustain the functionalities of the default Unity layout I have moved the fullscreen button to the inside of the WebGL player. The necessary editions to adapt this to your project are just updating the names of WebGL players as marked marked with red frames on yellow on the picture below.

You should absolutely remember to update the page title and might like to add some customization in the places also marked with green. This could include the loading logo and bar customisation. You can also customize the color of the WebGL player canvas before it gets started. In the more customized example here I have added a sort of splashscreen to the page background. In order for this splashscreen to appear I have set the initial canvas size to zero and delayed the start of the OnLoaded() function by firing that from the Start() function from inside the WebGL player using Application.ExternalCall(“OnLoaded”); . To prevent overwriting the index file with the new one when tweaking the WebGL build in Unity Editor, I would suggest using default.html or index.htm or index.php instead of index.html.
Here is the download link for the default.html file:
(Please go to the download in the updated version of this post – updated on 2015-07-13).
Facing the announced full npapi deprecacion due to come in the course of this year, we have to move from WebPlayer to WebGL player. Just for comparison – this is a link to the webplayer version of the build. You can also have a look at the post on the full browser webplayer on this site.
Day/night switch – unity3d lightmaps switching made simple and easy
I have recently made a research on day/night cycle Unity assets. There are plenty of them both commercial and free.
The most interesting and advanced one can be seen on this demo: http://youtu.be/YWLBMqY2SRQ.
https://www.assetstore.unity3d.com/en/#!/content/5674
and one of the free ones based on runtime shadows and skybox transitions can be found here:
http://www.galawana.com/unity3d-day-night-cycle-and-transition/
However there were no free assets based on unity3d lightmaps switching or transitions at runtime.
Instead I have found a LightMapSwitcher script on wiki and that was the starting point.
A case was I had two scenes: a day one with day lights and day lightmaps and a night with night lights and night lightmaps. The lightmaps have to be baked with the lock atlas option.
I packed everything into three streamed scenes:
- a loading scene with all the scripts
- a day scene with all the models and day lightmaps and day light and
- a night scene with night lights and lightmaps only
The day/night switch swaps the lightmaps and sets the appropriate lights active or inactive.
The setup has also involved some tagging job. I have tagged all the day specific objects from the day scene with the “day” tag and all the night specific objects from the night scene with the “night” tag.
I have also tagged all the models in the night scene that go exported with the first scene with the “EditorOnly” tag so they won’t be exported again, leaving only the lights and the lightmaps container.
Once the first scene loads, the download of the second one starts on the Start function of a DayNightSwitch script and the “day” tagged lights get collected into the dayObjects array. The camera data including the skybox, fog, and background color has to be collected into 2 elements camera settings array for later switching. Once the night scene loads a DayNightSwitch script just supplements the night lightmaps in the LightMapSwitcher component, nightObjects array, night camera settings and the day/night switch can get enabled.
Crossection/clipping tool
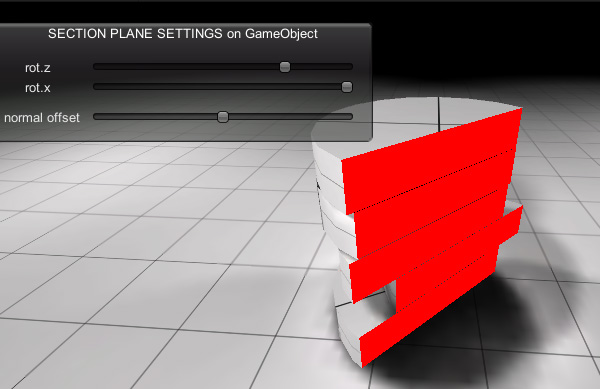
Here is a crossection/clipping tool I got published on the AssetStore some time ago. The tool operates on a collection of crosssection shaders which are the counterparts of selected basic Unity3d built-in shaders . The shaders on the object materials get substituted with these shaders and the user can manipulate the shader’s parameters moving the clipping plane.
The shader settings allow for rotation and offset of the clipping plane in relation to the GameObject renderer’s bounds centre.
The toom limitations are that it will work well only on closed and not intersecting meshes.
There is a number of Unity Forum posts and answers, where I took my inspiration from. Lots of invaluable resources on that can be found through wikibooks.
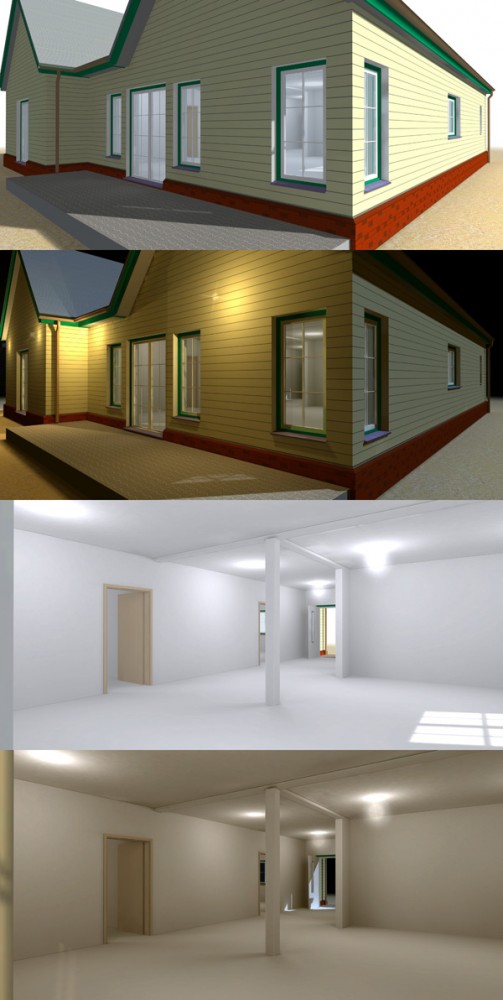
Here are the example scenes with the usage of crossection tool:
A quick example:
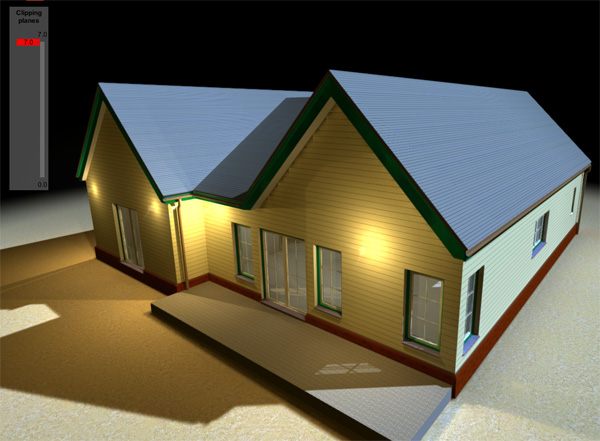
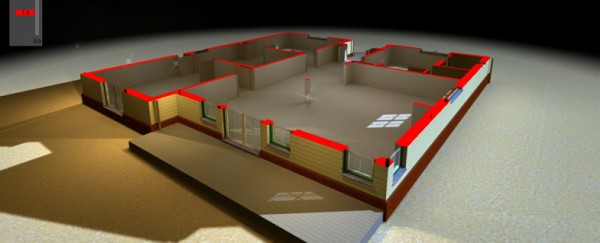
An architectural example – horizontal clipping through building:
A complex general examples on scenes build from free AssetStore assets:
And a WebGL demo:
https://virtualplayground.d2.pl/WebGL/crosssection/
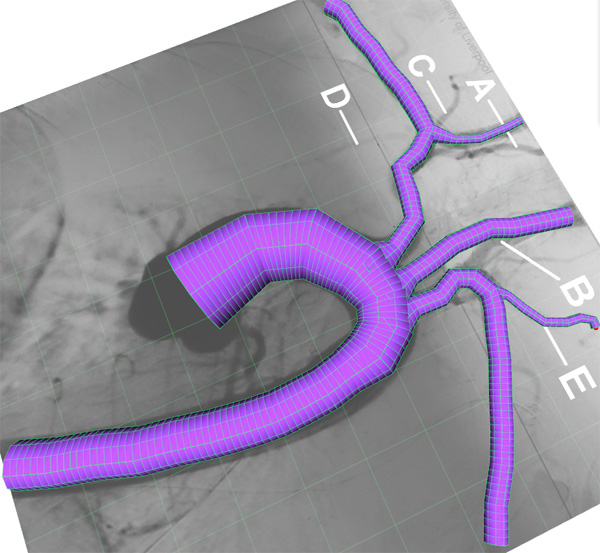
Branched tubework editor
This is a demo I made in Unity3d for a purpose of the testing of fluid flow in human organs.
A simple tool for creating the geometry was needed. The demo tool I came up with is capable of saving the files in the common 3d formats like .obj or .dae and also outputting it in the special format requred by the simulation program. The image below links to the webplayer which enables you to create, read and edit the branched tubework geometry. The demo operates on files stored on the server.
Simple mesh sculptor
This are just a few of assets and two demo scenes looking like a further development of the “Sculpt vertices” scene from Procedural Examples asset from Unity Tech demos.
I have just added some tool options and tool gizmo and one step undo function.
The tool – object interaction is based on the mesh collider which gets updated once the tool gets lifted.
The mesh update involves some heavy processing, thus causing a short freeze on the tool lift up. A possible remedy would be to move this process to the second thread.
Making it work more precise would also require adding the mesh subdivision functionality.
Here is the download link:
and the screenshots linking to the appropriate demo scenes:
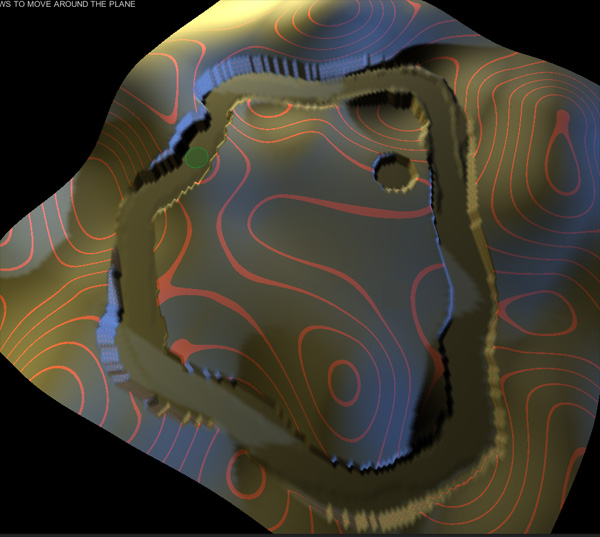
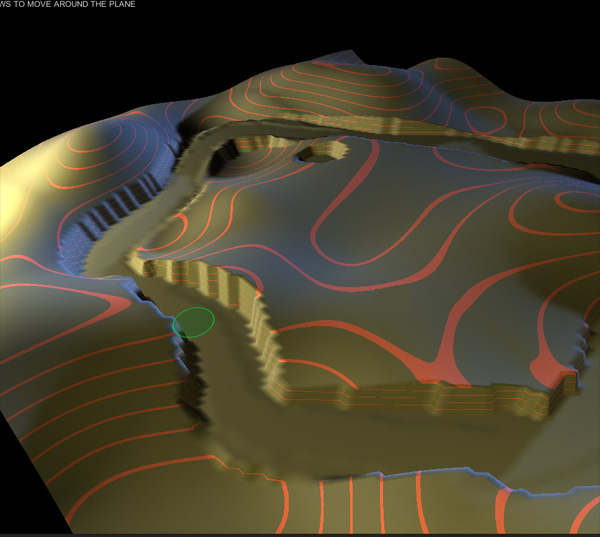
Playing with shaders – isolines
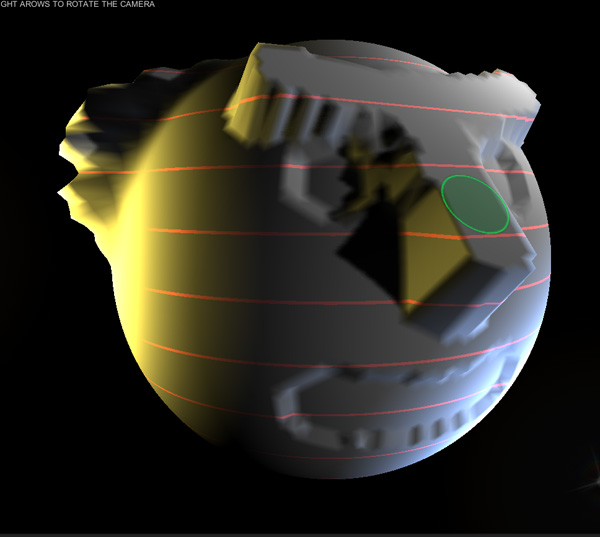
World space isolines shader
The shaders in Unity still remain a myth for me. But when I have a goal, I would find a way to make it by modifying already existing ones, basing on the resources in the web.
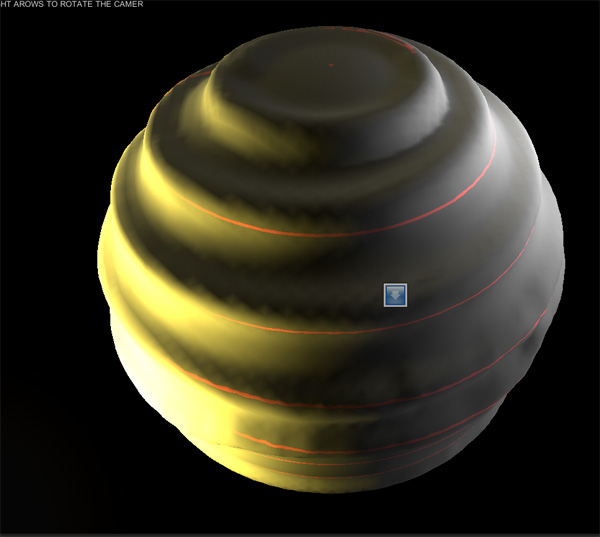
This time I targeted myself at getting an isolines shader. Its demo is here. There is a slider provider for changing the heiht itervals relative to the centre of the sphere.
I usually find the shader examples from http://docs.unity3d.com/Documentation/Components/SL-SurfaceShaderExamples.html as a good starting point for most what I need.
This time I have started fom the “Slices via World Space Position” shader found there.
  Shader "Custom/Isolines" {
    Properties {
      _MainTex ("Texture", 2D) = "white" {}
      _BumpMap ("Bumpmap", 2D) = "bump" {}
      _IsolinesColor ("IsolinesColor", Color) = (1,0,0,1)
      _heightInterval ("_heightInterval",float) = 1
      _lineWidth ("_lineWidth",float) = 0.1
    }
    SubShader {
      Tags { "RenderType" = "Opaque" }
      CGPROGRAM
      	  #pragma surface surf Lambert
          fixed4 _IsolinesColor;
          float _heightInterval;
          float _lineWidth;

      struct Input {
          float3 worldPos;
          float2 uv_MainTex;
          float2 uv_BumpMap;
      };
      sampler2D _MainTex;
      sampler2D _BumpMap;

      void surf (Input IN, inout SurfaceOutput o) {
         float a1 = frac(IN.worldPos.y/_heightInterval) - 1 +_lineWidth/_heightInterval;
         if(a1>0){
             o.Albedo = tex2D (_MainTex, IN.uv_MainTex).rgb + _IsolinesColor.rgb;
         }else{
             o.Albedo = tex2D (_MainTex, IN.uv_MainTex).rgb;
         }
         o.Normal = UnpackNormal (tex2D (_BumpMap, IN.uv_BumpMap));
      }
      ENDCG
    }
    Fallback "Diffuse"
  }
Below is the outcome:
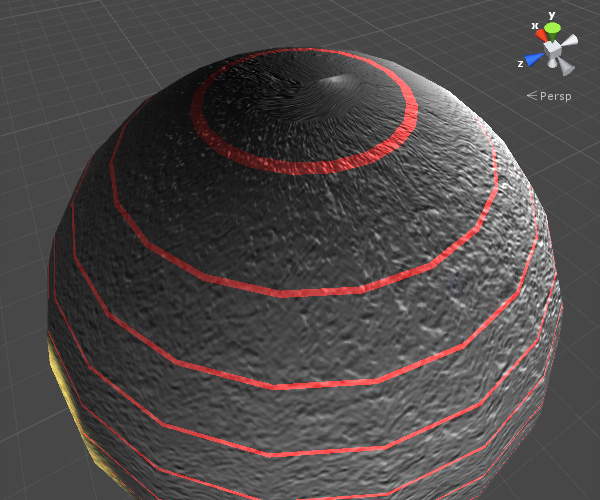
Some measures have to be taken to provide the equal line width for all the sphere’s latitudes so our picture looked like here:
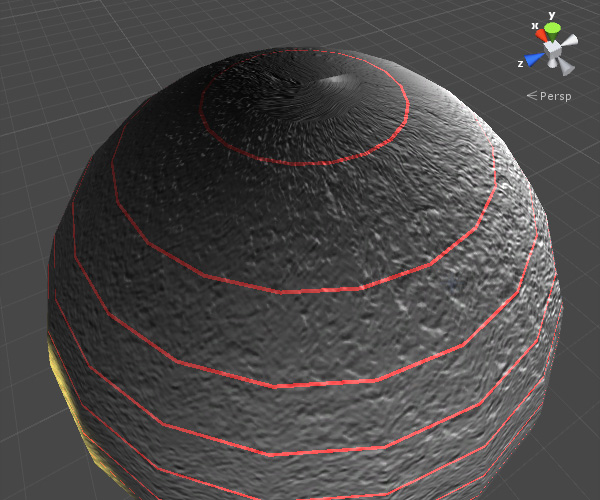
We just have to take the WorldSpace normal into account. That requires adding the vert function. Below is the final shader’s code and the file download is here:
  Shader "Custom/Isolines" {
    Properties {
      _MainTex ("Texture", 2D) = "white" {}
      _BumpMap ("Bumpmap", 2D) = "bump" {}
      _IsolinesColor ("IsolinesColor", Color) = (1,0,0,1)
      _heightInterval ("_heightInterval",float) = 1
      _lineWidth ("_lineWidth",float) = 0.1
      _Up ("_Up (x, y, z)", vector) = (0,1,0)
    }
    SubShader {
      Tags { "RenderType" = "Opaque" }
      CGPROGRAM
      #pragma surface surf Lambert vertex:vert
      	  fixed4 _IsolinesColor;
          float _heightInterval;
      	  float _lineWidth;
      	  fixed3 _Up;

      struct Input {
          float3 worldPos;
          float2 uv_MainTex;
          float2 uv_BumpMap;
          float a11;
      };
      sampler2D _MainTex;
      sampler2D _BumpMap;

      void vert (inout appdata_full v, out Input o) {
          UNITY_INITIALIZE_OUTPUT(Input,o);
          o.a11 = length(cross(v.normal, _Up));
      }

      void surf (Input IN, inout SurfaceOutput o) {
          float a1 = frac(IN.worldPos.y/_heightInterval) - 1 +_lineWidth* IN.a11/_heightInterval;
          if(a1>0){
          	  o.Albedo = tex2D (_MainTex, IN.uv_MainTex).rgb + _IsolinesColor.rgb;
          }else{
           	  o.Albedo = tex2D (_MainTex, IN.uv_MainTex).rgb;
          }
          o.Normal = UnpackNormal (tex2D (_BumpMap, IN.uv_BumpMap));
      }
      ENDCG
    }
    Fallback "Diffuse"
  }
LOD management demo
This is a simple lod testing example. It is based on Unity3d v.4 Pro buit-in LODGroups and the runtime access to that.
I was just making an automated tool for the creation of the big LOD based scenes from thousands of mesh pieces and just needed an experimental way to determine the LOD ranges to put into LODs.
Here is what I have ended up with:
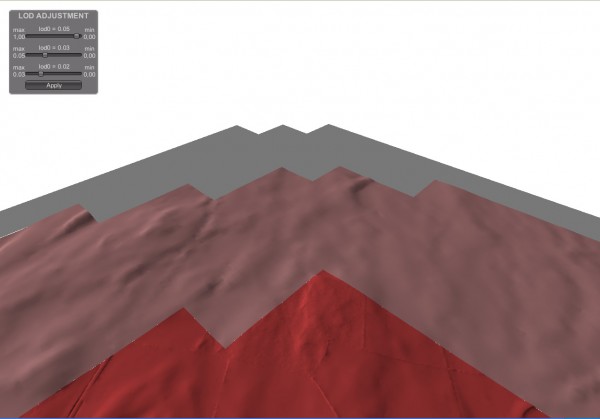
Click on the image to open the WebPlayer.
Move the slider and see what is going on. Obviously the ranges can not overlap and that is why manipulating with the top sliders is also moving the positions of the sliders below.
Of course in the normal work scenario the mesh swaps should run in the invisible way. In this case the meshed have been deliberately coloured to make the swaps visible.
Tweened animation
There are a few animation tween plugins for Unity. The most popular are iTween and HOTween. The first that has appeared was iTween and I have chosen that one to use in this experiment.
All the movable scene objects are groupped into the categories and attached to the array of lists in the animation script.
The lists gets sorted by the objects positions and the script loops through the subsequent lists applying the animation with incremented delay.
And that is what I have got. Click on the image to open the WebPlayer.

I just got accustomed for baking and using the lightmaps, but because these are inappriopriate for this case, I tried Screen Space Ambient Occlusion to simulate the shadows.
The runtime shadows available in Deferred Lighting rendering path are decrease the FPS quite much and lack antialiasing, but could be an option in I wanted to make just the every frame screenhots to combine them into video file at lower resolution, what I was actually going to do.
An artistic 3d vision of faculty logo
I got recently asked by a friend to create a 3d vision of Faculty of Physics at AGH University of Science and Technology in Krakow, PL to be laser engraved inside a glass cuboid. This is just an artistic form of the boron atom. It has to be artistic and as close as possible to the scientific model. Here it is: Then I just could not resist a temptation to animate the electrones on their orbits. You can use the top left button to controll the animation.
The animation trails use Unity3d trail renderer and the static trails – made of the alpha-mapped mesh for the purpose of engraving are switched off for the time of animation.
I just can not wait to see that engraved in glass and I am going to publish the picture of that engraved once I get it.

And here are the screenshots:


And ones with TrailRenderer on:


And ones with camera MotionBlurr on:


And ones with ParticleSystems:


And al last it comes. Pictures and video taken in a quite rudimentary conditions in the hotel. The tradesmen had ordered the data to be delivered in the .obj format and they had got it that way. Apparently were not able to imitate the diverse colour intensities and alpha-textures on the orbit toruses which I was hoping.
Here is a video.
[nggallery id=6]
Fluid WebPlayer html ebedding templates
The most common fluid layout for embedding the Unity3d WebPlayer is the full browser window one.
However to enable some user – browser communication and user data uploads I needed other ones with constant size elements to display info, links and data upload forms.
I have used javascript to calculate and set the styles properties of div elements on page loading and resize events.
Here are the examples:


You can download all the three html files zipped from here:
A PlayerPrefs/mysql texture management for the Unity3d WebPlayer
In this experiment I have created a simple two level edition system for online edits of the WebPlayer content.
The specially tagged geometry elements have a script attached, which displays a name label on hovering upon them. Clicking on them invokes the texture menu, which depends on number and kind of materials.
There are two edition levels simply depending on the authorisation level of the current user. The basic level is simply just unlogged user, while admin level is equivalent with the logged one. Both allow for the edits of the content, but in case of of unlogged user these are saved to the PlayerPrefs, while in the admin case are saved to mysql database and retrieved after the loading the scene.
The PlayerPrefs is the way for local storage of littleweight data on the local user computer, while mysql can serve for a global one.
If any mysql data given, the WebPlayer loads them first, and then loads the PlayerPrefs data, if any.
If you want to share the edits – you have of course to use the second option.
At the moment the solution supports the texture management and is basically aimed at visualisation of scenes, that share the same geometry, but differ with texture sets.
The base example is here:

In this blog I have used the WordPress blog login system. If you wanted to test how it works to edit and share the above example, Please register (if not registered) and log in to get the acces to the record manager.
The record manager serves to add and delete records to the database and generate the links.
The whole idea came from a friend of mine, who is an event organizer and organizes outdoor events, offering several scene setups with repetitive geometry, but individual graphics. This way he would get those setups with fixed geometry from me and then would be able tu put the individual graphic himself and send the links for his clients. Then the clients would still be able to experiment with the textures on their own – on the player prefs level – if he leaves this feature enabled for them.
The “alternative content” link at the bottom strip on the linked page is my that disappears after loading WebPlayer is my template element which allow the users which do not have the Unity3d plugin installed to access the alternative content which in this case is the picture gallery. The javascript enabled mobile devices that do not hawe the Unity3d WebPlayer support got automatically redirected.
Upload your texture to Unity and roll it
This tiny Unity3d application could be aimed to help the people to imagine how the flat graphic would look when printed on a coffe mug, pencil or anything cylindric.
There is a square mesh in the window centre and you can put any .jpg, or .png texture up to 4 Mb from your local filesystem onto it. After that the square turns into a rectangle of image proportions.
There is the vertical slider for adjustment of the bending angle and and the knob for turning the transformation axis. The basics of mesh modifier script comes from here.
The more are the proportions distant from square, the more interesting is the effect.

The direct link to the application is here.
Below are some screenhots.


This might also constitute a nice learning examples. The techniques used here include:
- runtime mesh deformations
- webplayer – browser communications
- WWW download
- simple server scripting
- webplayer embedding on the webpage
The download containing the web deployment files as well the unitypackage to import into Unity Editor – is now available below. Have a fun with it!